This is a tutorial to show how to use mng services in meditor.
Home address for source code of meditor is:
http://mesheditor.sourceforge.net
This assumes a little background about meditor. I just indicate how one could
proceed to use the service.
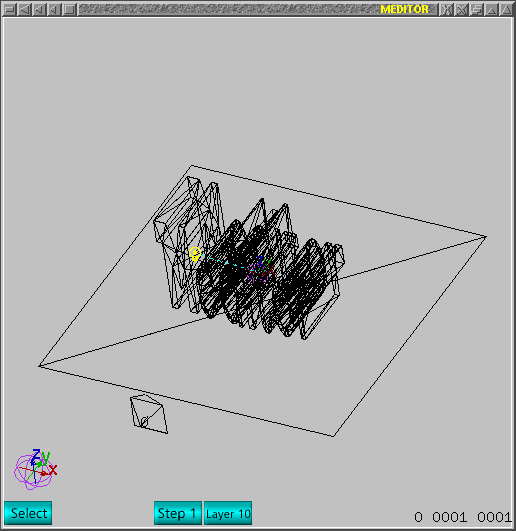
I suppose one already has a still scene.
I created a simple one and I only created 3 frames as example. The scene
have 2 meshes, one lamp, and one camera. See next image.
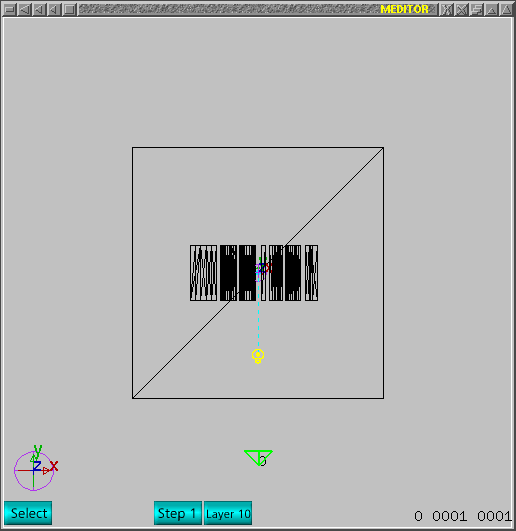
 As example, I will only create 3 frames and each frame will have different
camera position. Next image show upper view, so camera direction is on y
direction.
As example, I will only create 3 frames and each frame will have different
camera position. Next image show upper view, so camera direction is on y
direction.
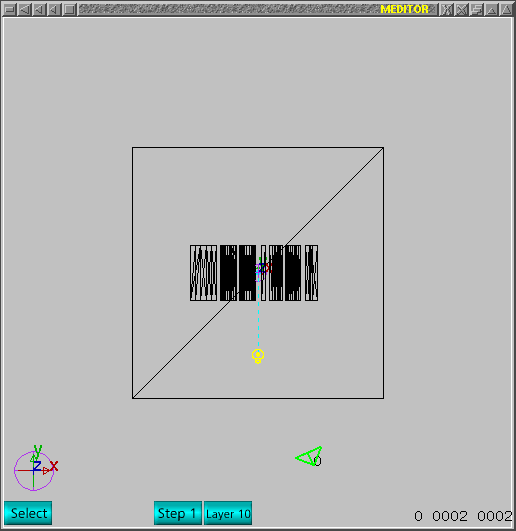
 I just used arrow key to create next frame and I moved the camera rightwards
and rotated it a little using 'r' command. Once 'r' key is released, one will
need to click left hand side mouse button to initiate rotation and horizontal
motion of mouse will rotate the object.One can check view using '.' key (period)
to change world view to camera view as a ring, i.e., if several cameras exist,
the '.' command will just run over all and back to world view. Notice the
frame is 2 and total frame is 2.
I just used arrow key to create next frame and I moved the camera rightwards
and rotated it a little using 'r' command. Once 'r' key is released, one will
need to click left hand side mouse button to initiate rotation and horizontal
motion of mouse will rotate the object.One can check view using '.' key (period)
to change world view to camera view as a ring, i.e., if several cameras exist,
the '.' command will just run over all and back to world view. Notice the
frame is 2 and total frame is 2.
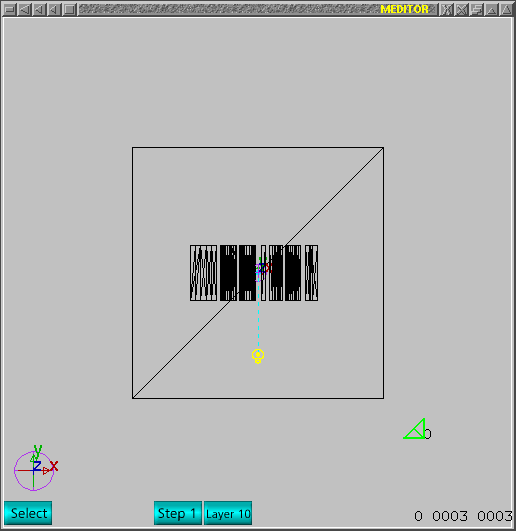
 Next is the last frame I created and I just moved the camera and rotated
it a little once more.
Next is the last frame I created and I just moved the camera and rotated
it a little once more.
Notice the frame is 3 and total is also 3.
 In order to use that camera as current for each frame, one needs to go back
to first frame using left arrow key and use '.' to get current camera view.
Repeat for all other frames, i.e., push right arrow key to go to frame 2
and 3 and proceed to enable camera view for each frame. Again, go back to
first frame using left arrow key.
In order to use that camera as current for each frame, one needs to go back
to first frame using left arrow key and use '.' to get current camera view.
Repeat for all other frames, i.e., push right arrow key to go to frame 2
and 3 and proceed to enable camera view for each frame. Again, go back to
first frame using left arrow key.
Now frames are complete and one can create rendered animation sequence as
MNG file. Just launch command window using 'g' key and push button under
label -Camera view- and window should look like next image.
 Once one can handle camera view parameters, one can create a small image
just changing image size. Next image shows width change. Click left hand side
mouse button on input field.
Once one can handle camera view parameters, one can create a small image
just changing image size. Next image shows width change. Click left hand side
mouse button on input field.
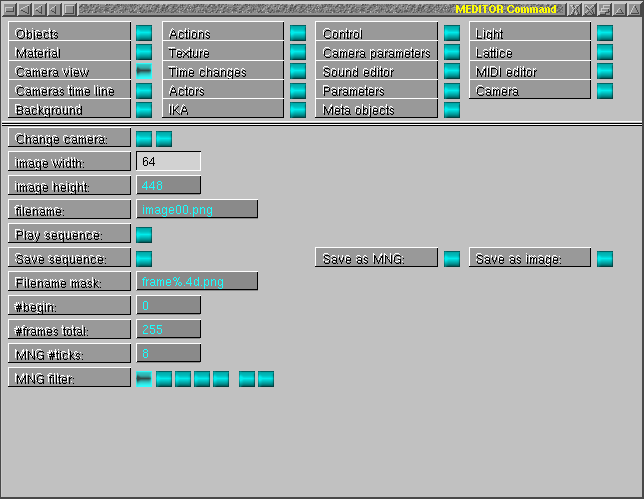 Next image shows height change.
 Once width and height are correct, one can create rendered sequence just
to see on screen, or save as separated images or even to save as MNG file.
This text is to create a MNG file, so one just pushes the button labeled as
-Save as MNG-, so the current frame up to last will be saved as image00.mng.
If one wants to see with no saved image, just push button under label
-Play sequence-.
Once width and height are correct, one can create rendered sequence just
to see on screen, or save as separated images or even to save as MNG file.
This text is to create a MNG file, so one just pushes the button labeled as
-Save as MNG-, so the current frame up to last will be saved as image00.mng.
If one wants to see with no saved image, just push button under label
-Play sequence-.
In order to play the MNG file, one should use mngplay or dummy. Both are
packed with libmng. Current version of animate (from ImageMagick) does not
work and I don't know why yet.
That is all folks!